之前一直用TeamViewer,好景不長,對於個人用戶又是限制並發數,又是限制設備數。服務器在國外速度也不快。話說現在喜歡折騰的小夥伴誰沒有幾台電腦手機啊。
後面改為國內號稱免費的ToDesk,那必須得支持啊。用了沒多久推送VIP開通廣告窗口就開始接踵而至了。
目前,RustDesk支持Linux Server和Windows Server服務器;看自己的取捨,Linux比較節約資源,而Windows方便小白上手。
本文是在阿里雲服務器,Linux系統,寶塔面板下測試安裝,其他環境請自行測試。
下面是詳細操作:
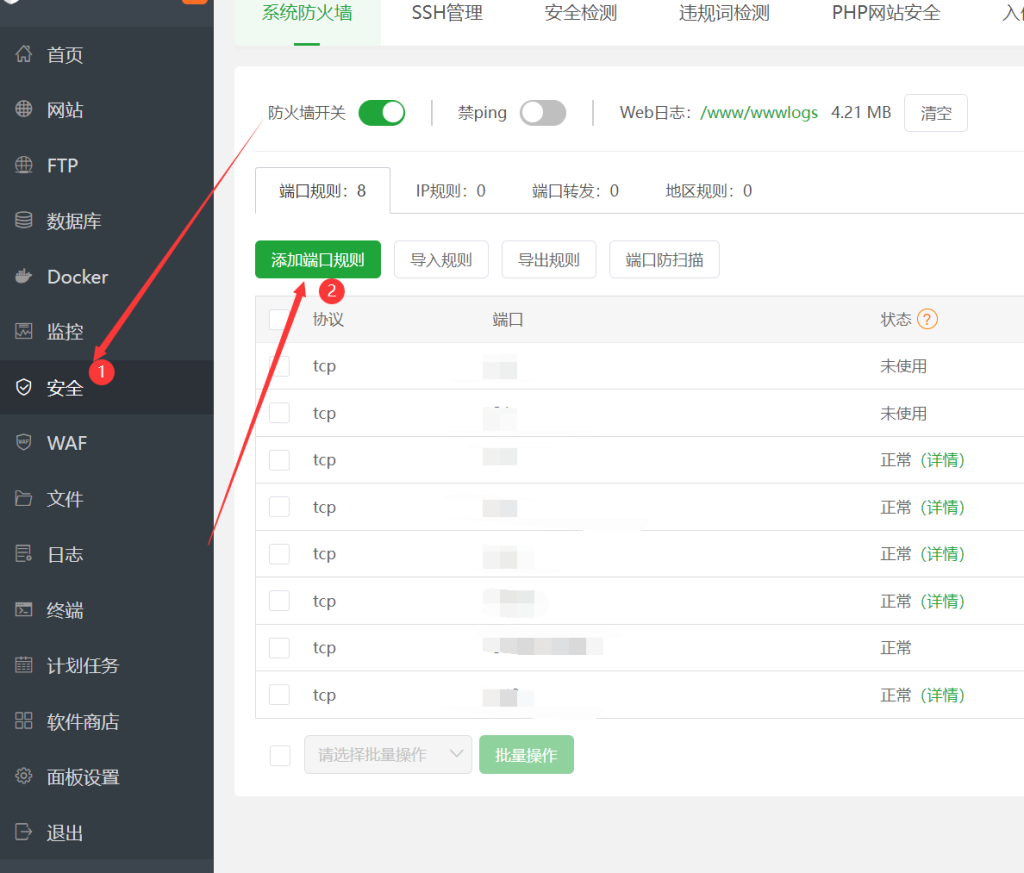
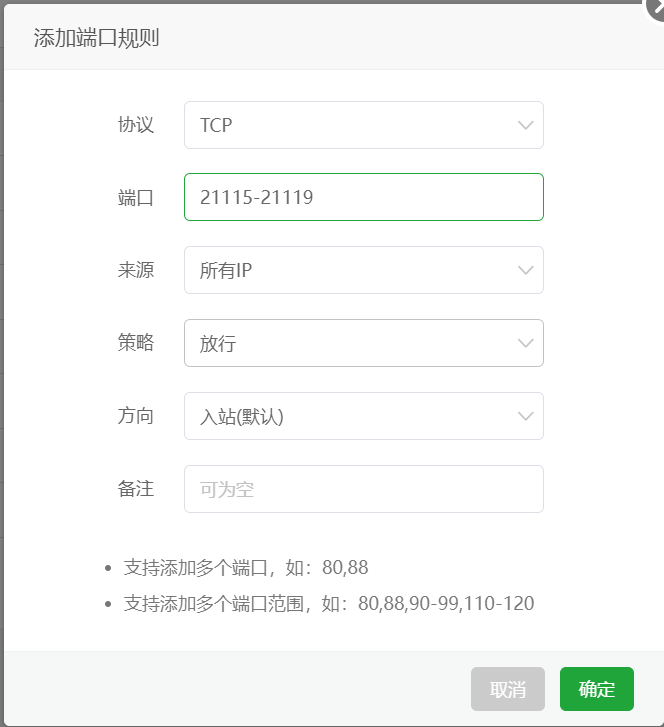
一、配置安全組,放行端口
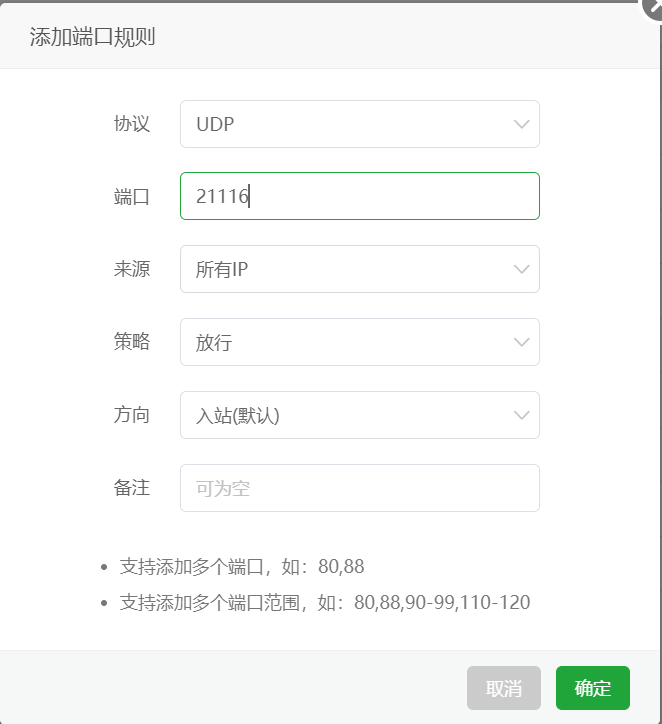
1、放行端口(服務器商安全組、寶塔面板端都需要放行)
TCP:21115-21119
UDP:21116


寶塔面板放行端口
二、配置RustDesk中繼服務器(自建服務器)
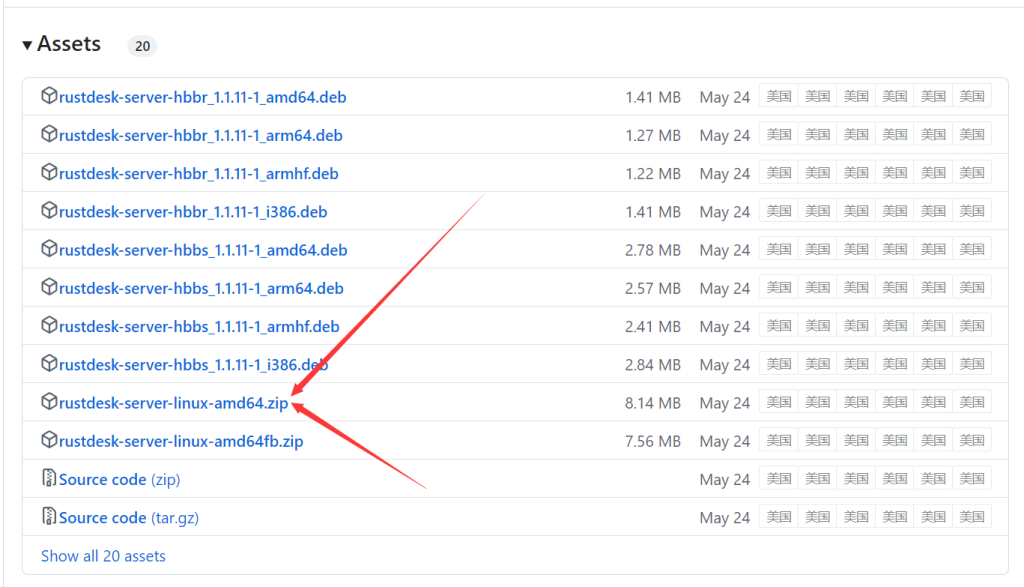
1、下載rustdesk服務器端文件
下載地址:https://github.com/rustdesk/rustdesk-server/releases
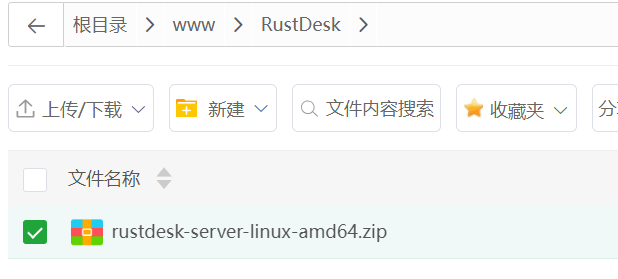
2、下載好文件後,上傳到寶塔面板任意文件夾下面
本次測試上傳到/www/RustDesk
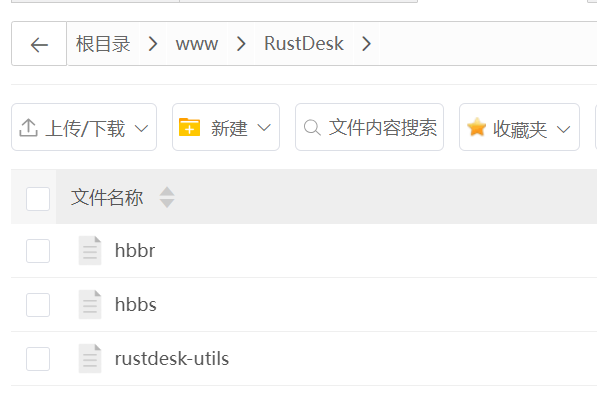
3、解壓文件並將/www/RustDesk/amd64裡面的文件剪切到/www/RustDesk下,並且刪除文件amd64
4、在寶塔上運行進行hbbr和hbbs
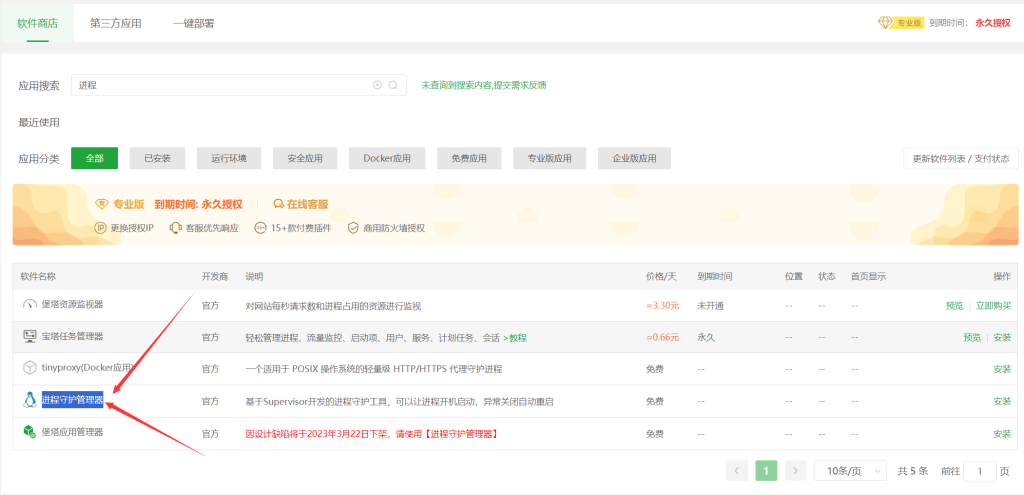
4.1、在寶塔軟件商店安裝進程守護管理器
4.2、使用進程守護管理器添加守護進程管理hbbr
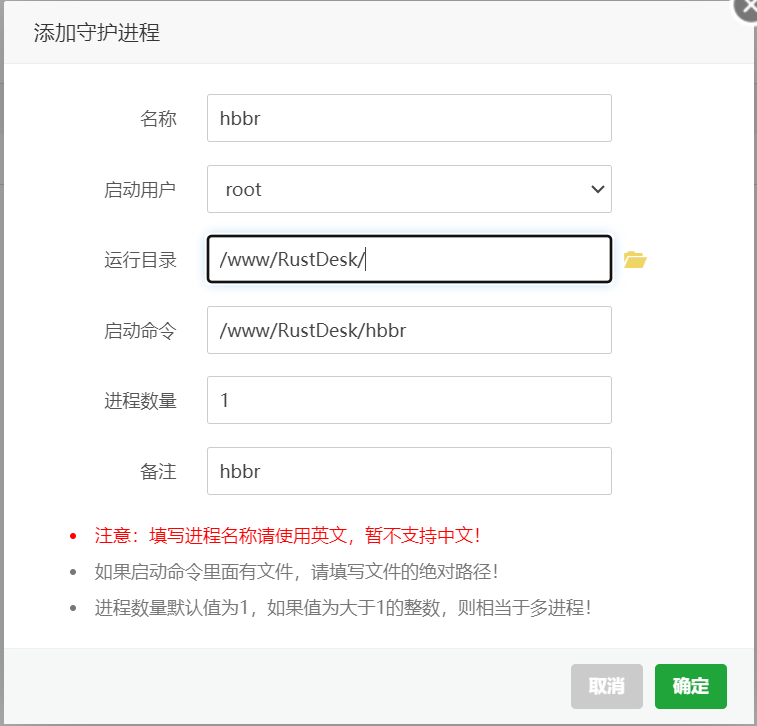
注意:運行目錄和啟動命令
4.3、使用進程守護管理器添加守護進程管理hbbs
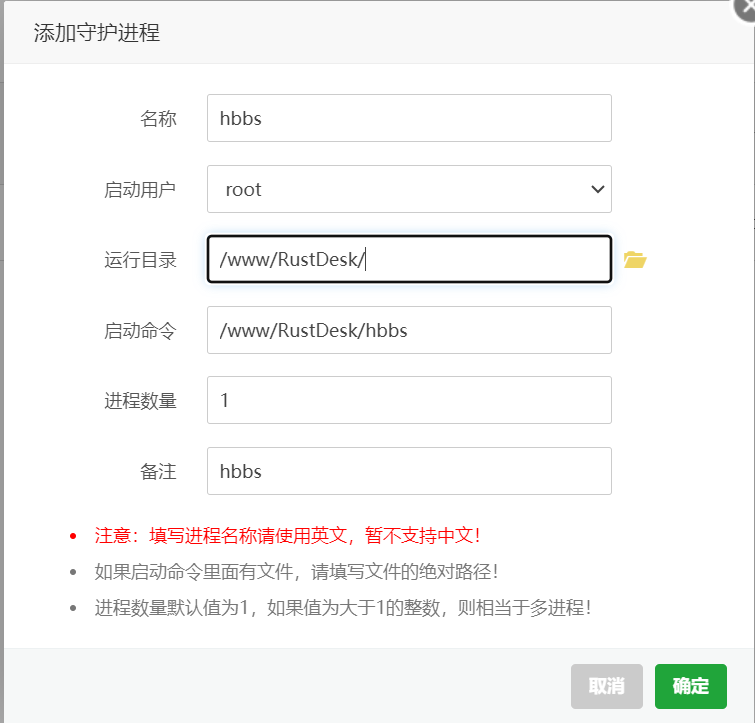
注意:運行目錄和啟動命令
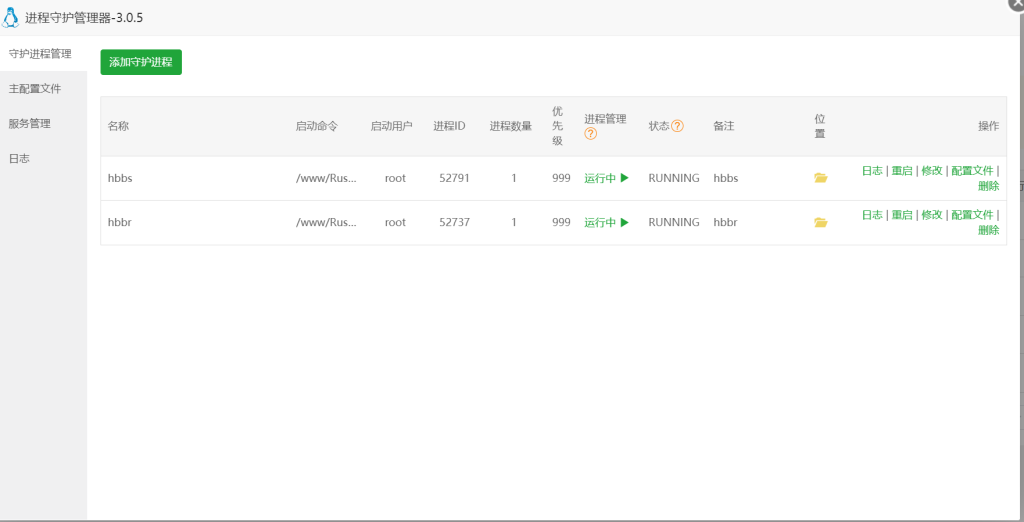
成功運行後如圖所示
以上為配置中繼服務器所有內容
下面配置軟件
三、配置rustdesk用戶端軟件
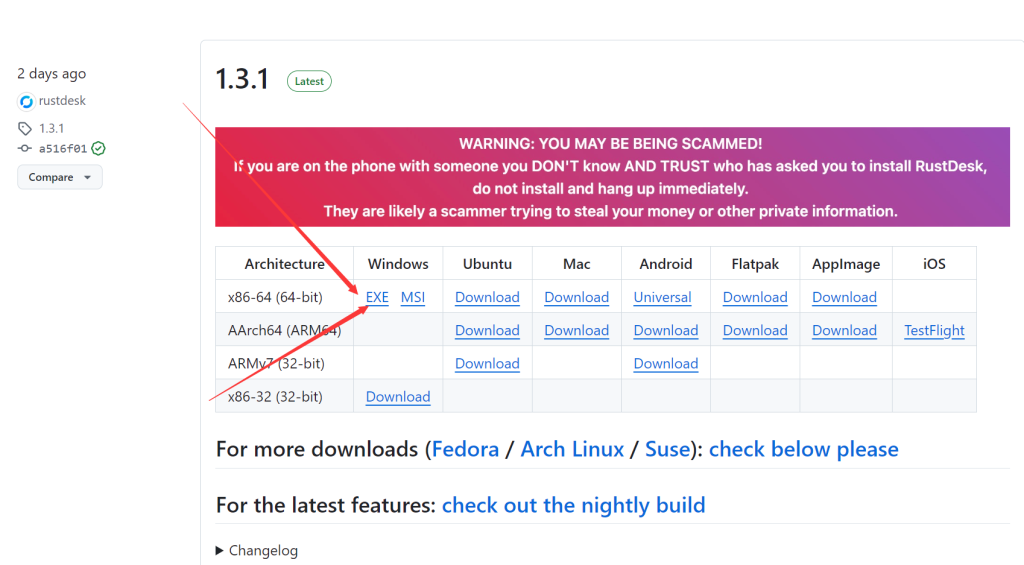
1、下載rustdesk客戶端軟件
下載地址:https://github.com/rustdesk/rustdesk/releases
2、下載軟件後運行軟件
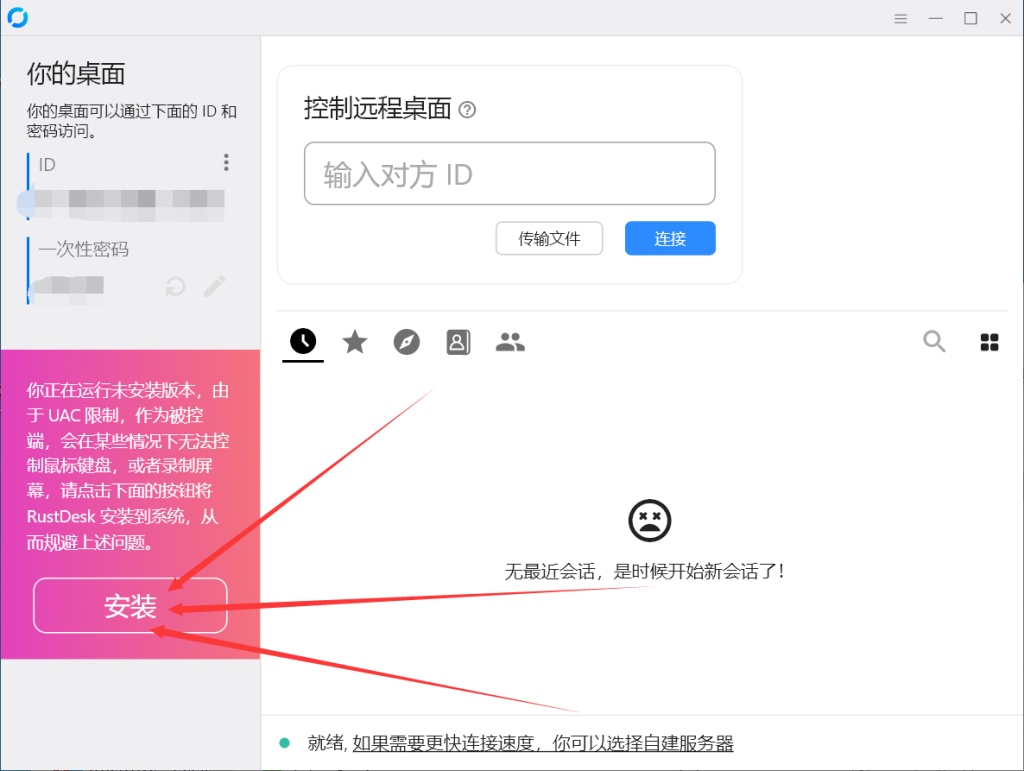
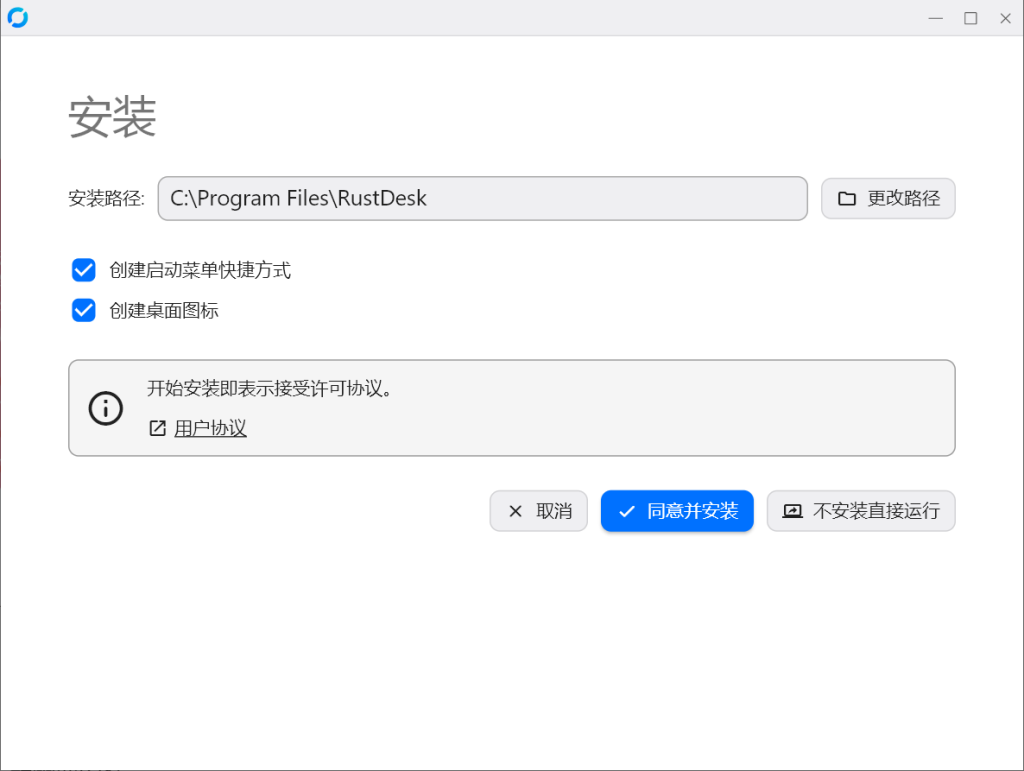
2.1、安裝rustdesk軟件
如果你只是想要被控,可以將你的ID,一次性密碼告訴別人,這樣就可以直接鏈接了。
如果你要作為主控端,就需要安裝
3、配置ruatdesk軟件
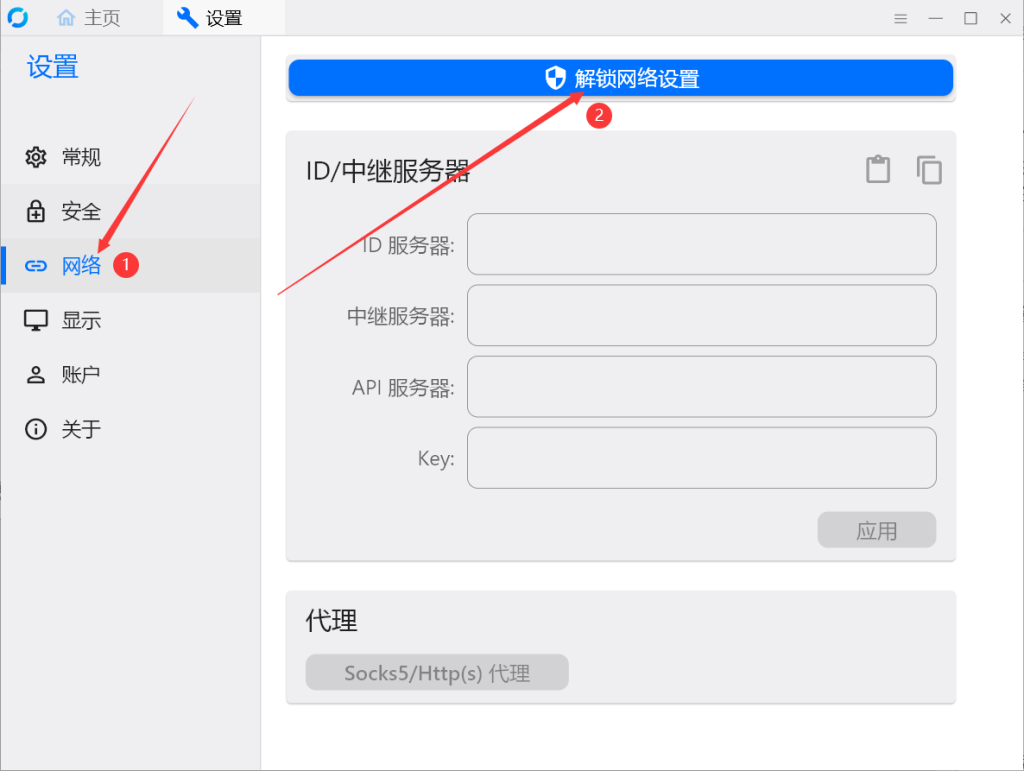
3.1、點擊右上角的三杠
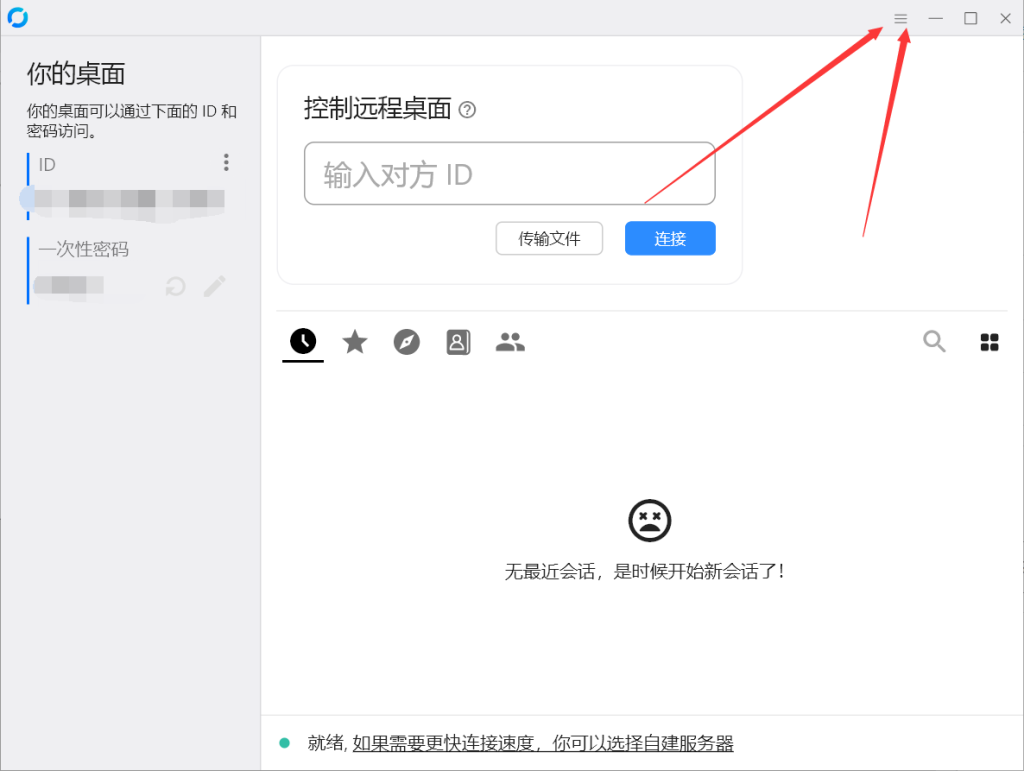
3.2、點擊網絡-解鎖網絡設置
3.3、配置網絡
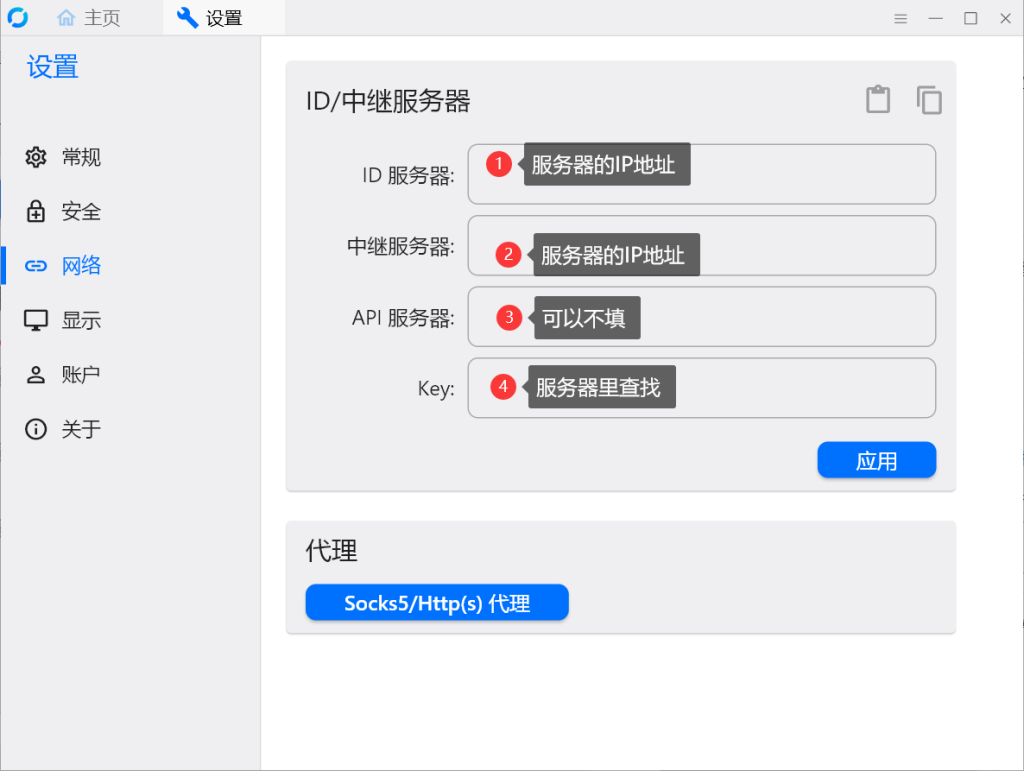
第④裡面的Key,在服務器文件/www/RustDesk/id_ed25519.pub,打開後複製裡面的所有內容到Key中,然後點擊應用
3.4、點擊首頁查看,發現軟件已經就緒
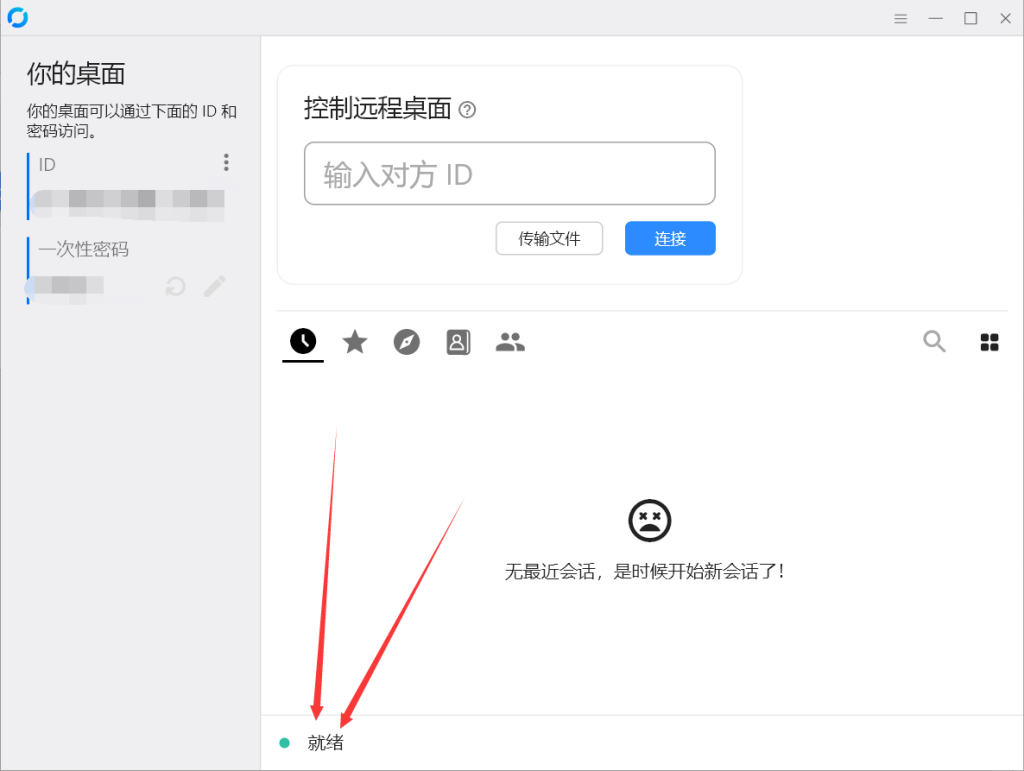
到此,就已經全部配置完成了
四、配置其他的用戶端
其他的用戶端,比如其他的Windows電腦,Mac電腦,手機端,都是類似的方法,配置好之後就可以進行鏈接了。
參考視頻:https://www.bilibili.com/video/BV17142167Yh/?vd_source=6904a9a534961ae8dae398f6b73b93f9
到此為止。
發布者:彬彬筆記,轉載請註明出處:https://www.binbinbiji.com/zh-hant/jianzhanjiaoliu/3415.html